Wrapping Tutorials
Petal-Edge Paper Bouquet Shell with a Taped Rim
Nov
Build the visible paper shell from folded white layers, shaped patterned panels and a taped outward rim. Follow the layer order around the block-and-stand support shown.
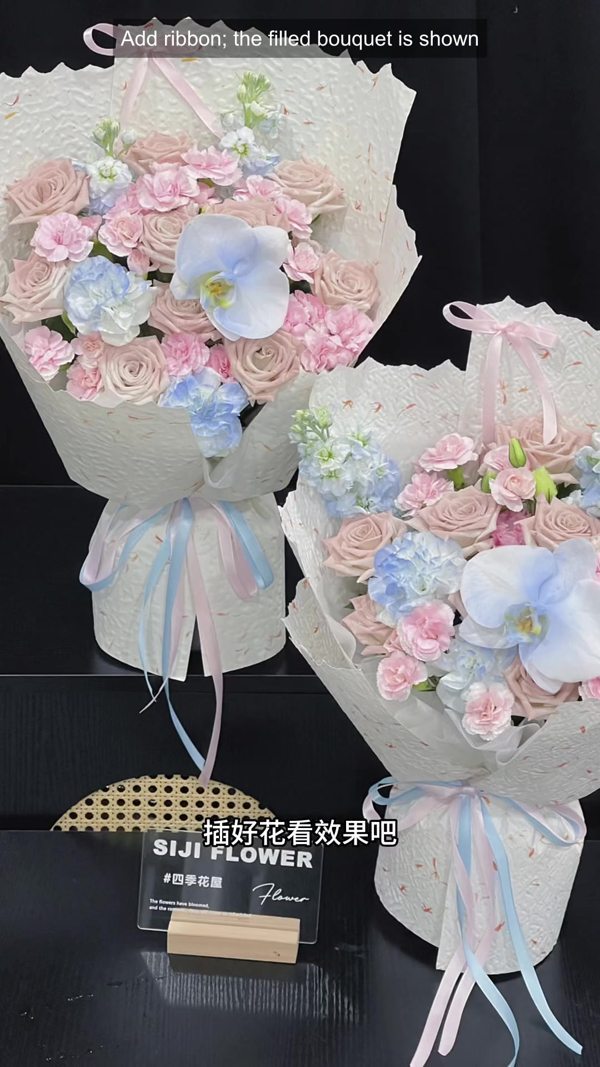
The filled bouquet appears at the opening and finish. Flower insertion and complete bow tying are outside the paper-work sequence.
Watch on Instagram Request materials for this look
Watch on Instagram
Open the matching demonstration on Instagram. Chapter times are approximate.
Materials visible in the demonstration
- The block-and-stand forming support shown
- White lining sheets and patterned wrapping panels
- Tape, cutting tools and the prepared ribbon finish
Follow the visible sequence
00:00–00:03 · Petal-edge paper: layered bouquet shell
Compare the opening flower-filled example with the paper shell that follows. The visible paper work sets up the outline of that finished presentation.
00:03–00:09 · Wrap the block and stand to form the support
Wrap the block and stand shown in the clip to establish the forming support. Follow the wrapped contour that the next paper layers will gather around.
00:09–00:15 · Fold a white sheet; gather it at the front
Fold a white sheet and gather it at the front of the support. Compare the folded edge and the lower gathering point before adding the next layer.
00:15–00:20 · Add another folded white layer behind
Add another folded white layer behind the first. Follow the change in edge height and the space left between the front and rear layers.
00:20–00:24 · Cut the patterned sheets into half-panels
Cut the patterned sheets into the half-panels shown. These smaller panels become the separate backing and side pieces in the following sequence.
00:24–00:35 · Shape a decorative edge on the paper panels
Shape the decorative edge with the finger movements shown. Compare the repeated curved sections along the edge before bringing the panels together.
00:35–00:39 · Overlap two panels to build the backing
Overlap two prepared panels to make the backing. Keep their decorative edges visible as one layered outline behind the support.
00:39–00:44 · Place a folded white layer inside the shell
Place a folded white layer inside the shell. Compare how the lighter inner surface separates the patterned backing from the opening.
00:44–00:49 · Add patterned panels to both side edges
Bring patterned panels around both side edges. Follow their overlap with the backing and the white inner layer as the shell becomes fuller.
00:49–00:54 · Tape the front rim and curl it outward
Apply the tape along the front rim, then curl that edge outward as shown. Compare the outward curve with the higher backing behind it.
00:54–01:00 · Gather the side panels around the support
Gather the side panels around the support. Keep the decorative upper edges visible while following the lower folds into the base.
01:00–01:04 · Align the paper layers and secure the base
Align the paper layers and secure the base. Compare the front rim, backing height and side edges together before adding the finish.
01:04–01:08 · Add ribbon; the filled bouquet is shown
Add the ribbon finish shown, then compare the filled example. The source jumps to the flower-filled result and uses a prepared ribbon finish; flower insertion and complete bow tying are separate stages.
Plan the patterned layers and taped rim
Measure your own forming support and intended shell height and width. Ask for patterned wrapping, white inner-sheet, tape and ribbon options suited to the shape you want to make. Select “Other” for a mixed-material enquiry.
- Describe the desired pattern, white inner surface and curved decorative edge. Ask for composition, sheet or roll dimensions and samples for shaping.
- For tape and ribbon, request widths, lengths, selling units and pack quantities.
- Give your dimensions, quantity and destination. Choose materials after reviewing their specifications and samples for your own version.
Article: Petal-Edge Paper Bouquet Shell with a Taped Rim. https://fafaflower.com/petal-edge-paper-bouquet-shell-layering-and-taped-rim-tutorial-v2/. Please advise patterned wrapping and white inner sheets, tape and a ribbon finish for our [support dimensions] and [finished shell height/width]. Quantity: [quantity]; destination: [destination]. Please include composition, available dimensions, selling units, pack quantities and samples for shaping the decorative edge.
Copy the enquiry note above into Additional Details in the form, choose “Other”, and add your quantity and destination.
Reference demonstration: supplied florist footage. Guide by FAFAFLOWER.
