Wrapping Tutorials
Pink Round Bouquet Tutorial: Dotted Paper Layers and a Ribbon Finish
Oct
Last updated:
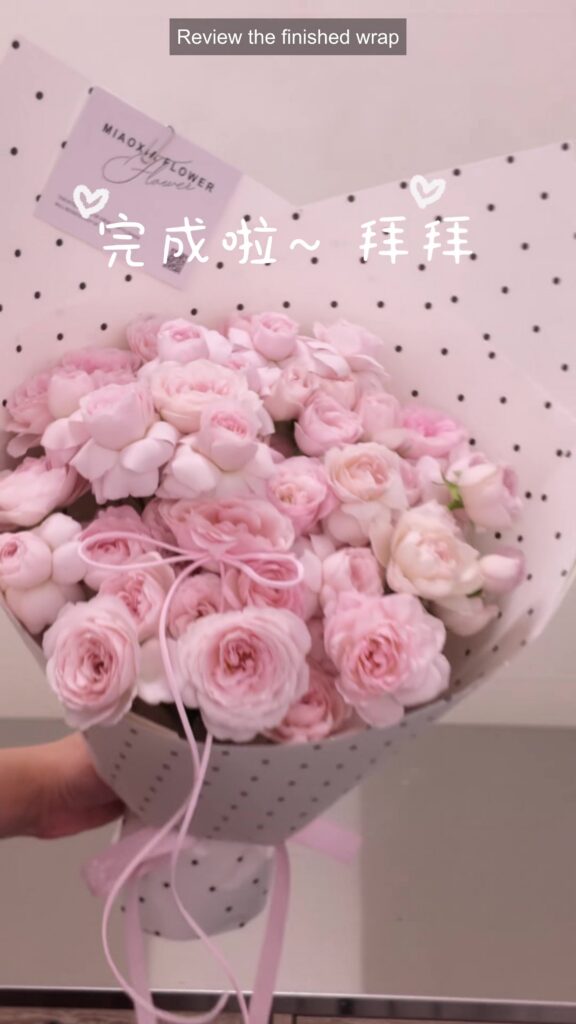
This pink round bouquet wrapping tutorial begins before the paper goes on. The maker holds a small pink center, adds flower stems around it and compares the slight height differences across the flower face. A clear wrapping stage appears at the lower stems, followed by pale dotted outer panels, a covered grip and pink ribbon. The demonstration makes it possible to compare the round flower face with the pointed paper outline without assuming a measured paper template.
Materials shown in the demonstration
- Pink flower stems; exact varieties and flower count are not established
- A green stem-end support piece and clear wrapping film; formulation and wetting are not verified
- Pale outer wrapping sheets with small dark dots; paper composition is unidentified
- Pink ribbon and a finishing card
Follow the visible steps
- 00:00–00:08 — Begin the held center The clip starts with a small group of pink flower stems. More stems are brought around that center while the maker maintains a grip near the lower flower area. This is the beginning of the bouquet construction, not an already-finished bunch being wrapped.
- 00:08–00:22 — Compare the flower heights The maker adds more pink flower faces and turns the developing bouquet. Some faces sit slightly higher than others. Watch the changing upper outline and the placement of the side flowers rather than treating every stem as having one fixed height.
- 00:22–00:40 — Complete the rounded flower face The bouquet becomes wider as additional stems are placed around its sides. The maker makes small adjustments at the grip and checks the fuller front. No universal stem count or cutting length is provided by this visual guide.
- 00:40–00:44 — Observe the lower support and film A green support piece appears with clear film at the lower stems. The next view shows the film gathered around that area. The footage establishes a visible wrapping sequence, but this guide does not infer the support formulation, wetting method or a tested water-retention performance.
- 00:44–01:04 — Layer the dotted paper and cover the grip A pale dotted sheet forms the back of the wrap. The maker folds the sides inward, overlaps another outer panel and gathers the sheets at the grip. A lower cover hides the clear stem-end wrapping, then the front edges are adjusted. Some fastening movements are partly hidden by the maker.
- 01:04–end — Add ribbon, card and the final check Pink ribbon is brought around the grip and arranged into the finishing bow. A card is added before the bouquet is held up for the final views. Compare the flower height, pointed corners and ribbon tails together; the camera does not provide a separate knot-by-knot bow lesson.
Compare the round center with the pointed outer frame
The flower face is built as a rounded grouping before the wrap gives it taller corners. The dotted panels overlap rather than meeting as one flat collar, so the back and front edges remain distinct. When studying this example, compare how much of the flowers remains visible above the front sheet and how the lower cover connects the outer frame to the grip.
Choose the dimensions and care method for your actual stems
The pale dotted appearance is visible, but the clip does not establish paper composition, sheet dimensions or a catalogue product. The green support and clear film do not establish a general hydration recipe. Select the actual size and stem-care method for your own materials; the visible folding sequence is a design reference, not a guarantee of water retention.
The Instagram tutorial
Watch the same demonstration on FAFAFLOWER’s Instagram.
More wrapping references
Compare the panel order in our lavender layered wrapping tutorial, or read What Paper Do Florists Use? for material selection.
Music: “Acoustic Guitar #1” by Jason Shaw / Audionautix — source. Licensed under CC BY4.0. Changes: Excerpt, fades and level adjustment.
Video source: 杪夏 Flower on Xiaohongshu, shared with permission. Original design and footage remain credited to the creator; FAFAFLOWER added the English visual steps. These written notes describe the visible process and are not a verbatim audio transcript.
