Wrapping Tutorials
Soft Pink Bouquet Tutorial: Build the Shape and Add Textured Brown Wrap
Oct
Last updated:
This soft pink bouquet tutorial follows the visible sequence from arranging stems in the hand to adding a warm brown paper frame. The shape is built before the outer sheets are introduced, so the wrapping supports the arrangement rather than hiding its airy details. Watch the complete demonstration, then use the stage notes below to compare the order with your own practice.
Materials shown in the demonstration
- Mixed pale pink and white flowers in rounded, open and upright forms
- Leafy stems, fine branching accents and a green-and-pink accent visible in the arrangement
- Pale inner wrapping and textured brown outer sheets
- Light-colored ribbon and the visible wrapping fasteners
Follow the visible steps
- 00:03–00:20 — Establish the center and height The maker holds a pale focal bloom, then introduces upright stems and rounded flowers nearby. Compare the top line before adding more material: some stems rise above the main face while others sit closer to the center. Keep the grip controlled while leaving room to reposition individual stems. The clip shows placement choices, not a measured flower recipe.
- 00:20–00:45 — Balance the sides and depth More rounded blooms, fine clusters and leafy accents are placed around the initial group. A green-and-pink accent adds a different silhouette to one side. The maker turns the bouquet repeatedly, checking the face from different angles. Follow those changes in spacing and height without assuming that every flower head should form the same flat plane.
- 00:46–01:00 — Gather the inner wrapping Pale wrapping is brought around the lower arrangement and gathered near the stems. The upper flower face remains visible while the bottom is held together. A jug appears briefly in this sequence, but the footage does not establish the full construction of a moisture liner; choose any necessary moisture protection using your own material specifications.
- 01:02–01:14 — Add the brown outer frame A large textured brown sheet is brought behind and around the bouquet. The maker gathers it below the flowers while leaving the upper edges at different heights. Check the side view as well as the front so that the paper forms a frame around the flower heads. Sheet measurements and composition are not provided.
- 01:14–01:26 — Overlap the front panel A shorter brown section is positioned at the front, adding another visible edge below the bouquet face. The maker folds and shapes it at the grip rather than pressing the paper across the flowers. Compare how much pale lining remains exposed before tightening this layer. The two brown surfaces appear textured, but their exact material is not identified.
- 01:26–01:46 — Neaten the base and add ribbon The lower wrapping is adjusted and the base is tidied before a light ribbon is tied around the grip. Open the paper edges enough to keep the flowers visible. Some of the securing work is partly obscured by the hands, so test the fastening method on your own materials instead of inferring a hidden knot or a particular adhesive.
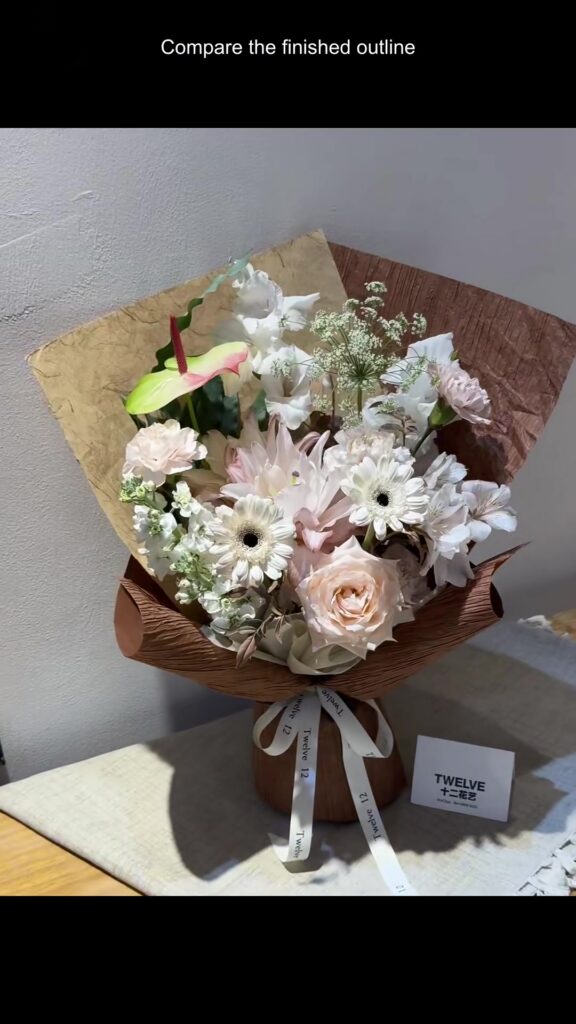
- 01:46–01:53 — Review the finished bouquet The final view shows the warm outer frame, light inner layer and ribbon below the soft flower face. Compare the overall outline with the earlier arrangement stage. The original creator card remains visible, and the final display includes the source video’s own black borders; the complete frame is retained.
Adapt the shape to your bouquet
Use the sequence as a layout exercise: establish your floral outline first, test a pale inner layer, then compare the height of the brown sheets. A smaller arrangement may need a shorter front panel, while a taller design may need more room behind the upright stems. Turn the bouquet between adjustments and keep the grip comfortable for the person carrying it. These are practice adaptations rather than measurements given by the creator.
Choose the wrapping layers
The outer sheets appear brown and textured; the inner layer is pale. The video does not confirm paper fiber, coating, thickness or resistance to moisture. Select materials according to their actual specifications and the weight of your arrangement. A light ribbon provides contrast at the grip, but the visible finish does not identify a particular ribbon product.
Compare material options in the wrapping paper, lining paper and ribbon collections. These are related material categories; a specific listed product is not identified from the video.
The Instagram tutorial
Watch the same demonstration on FAFAFLOWER’s Instagram.
More wrapping references
Compare the panel order in our lavender layered wrapping tutorial, or read What Paper Do Florists Use? for material selection.
Original tutorial by TWELVE十二花艺工作室 on Xiaohongshu, shared with permission. Original design and footage remain credited to the creator; FAFAFLOWER added the English visual steps. These written notes describe the visible process and are not a verbatim audio transcript.
