Wrapping Tutorials
White Cone Wrapper Tutorial with Pink Floral Finishing
Nov
Shape the white cone first, then use its edge and overlap to guide the pink flower outline. Finish the presentation with long ribbon tails and the carry-bag insert shown.
Prepare the internal flower support separately; that preparation is outside this sequence. The spray products seen in the clip are unidentified, so the guide follows the visible shaping, flower placement and finishing.
Watch the demonstration Request materials for this look
Watch the full demonstration
If the player is unavailable in your browser, watch the same full demonstration on YouTube. It is also available on Instagram.
Materials visible in the demonstration
- White sheet material for the cone and an adhesive selected for that material
- Pink and pale flower faces, branching stems and small white accents
- Pink ribbon, fine cord and a display card
- A carry bag and a pre-cut insert fitted to your actual container
Follow the visible stages
00:02–00:18 · Cut white paper and shape it around the tapered form
Curve the white sheet around your tapered form. Compare the top edge, overlap and intended height before trimming the excess.
00:18–00:36 · Glue the overlapping body and front pieces
Join the overlapping body and front pieces while holding the taper. Keep the developing outline visible as the pieces meet.
00:36–00:56 · Shape and trim the tall white cone shell
Trim the tall shell to create the differing edge heights shown. Compare the empty opening and the front overlap before moving to the flower finish.
00:56–01:24 · Open the outer petals of the pink flower faces
Watch how the maker opens the outer petals of the pink flower faces to broaden their visible surface. Use the appropriate care guidance for your own flowers.
01:24–01:40 · Prepare the pale accent flower faces
Compare the pale flower faces with the pink group. Use their lighter colour and different scale to plan breaks in the pink flower area.
01:40–01:46 · A spray product appears in the source
An unidentified spray appears briefly in the clip. Treat this shot as source context and continue to the visible flower-placement sequence.
01:46–02:04 · Set the first branching stems at different heights
Place the first branching stems at different heights through the prepared opening. Compare the upper stem line with the tall white edge.
02:04–02:46 · Build the pink flower area and balance the front
Build the pink flower area while turning the arrangement to compare the front. Follow the relationship between the flower surface and the white edge as the outline develops.
02:46–03:04 · Add pale accents and small white flowers
Add pale accents and small white flowers between the pink faces. Compare their spacing and the outside line after each addition.
03:04–03:18 · Fill gaps and compare the outline
Fill the smaller visual gaps. Check the flower area against the cone from the front and side, keeping the white edge readable around it.
03:18–03:32 · Form pink ribbon loops and long tails
Form loops with the pink ribbon and leave long tails to hang against the white cone. Adjust the tails for your chosen presentation.
03:32–03:46 · Add fine cord details and attach the ribbon
Add the fine cord details and attach the ribbon finish at the positions shown. Compare the decoration with the curve of the cone.
03:46–04:02 · Add the front label and display card
Position a label and display card to finish your own presentation. Compare their placement with the flower surface and the cone edge.
04:02–04:18 · Fit the cut-out support inside the carry bag
Fit the pre-cut insert inside the carry bag and compare its circular opening with your actual container. This stage follows the fitting of an insert prepared beforehand.
04:18–04:30 · Original finishing and photo views
Use the finishing and photo views to compare the flower outline, ribbon position and cone together. The spray-product note at the start applies to these finishing views too.
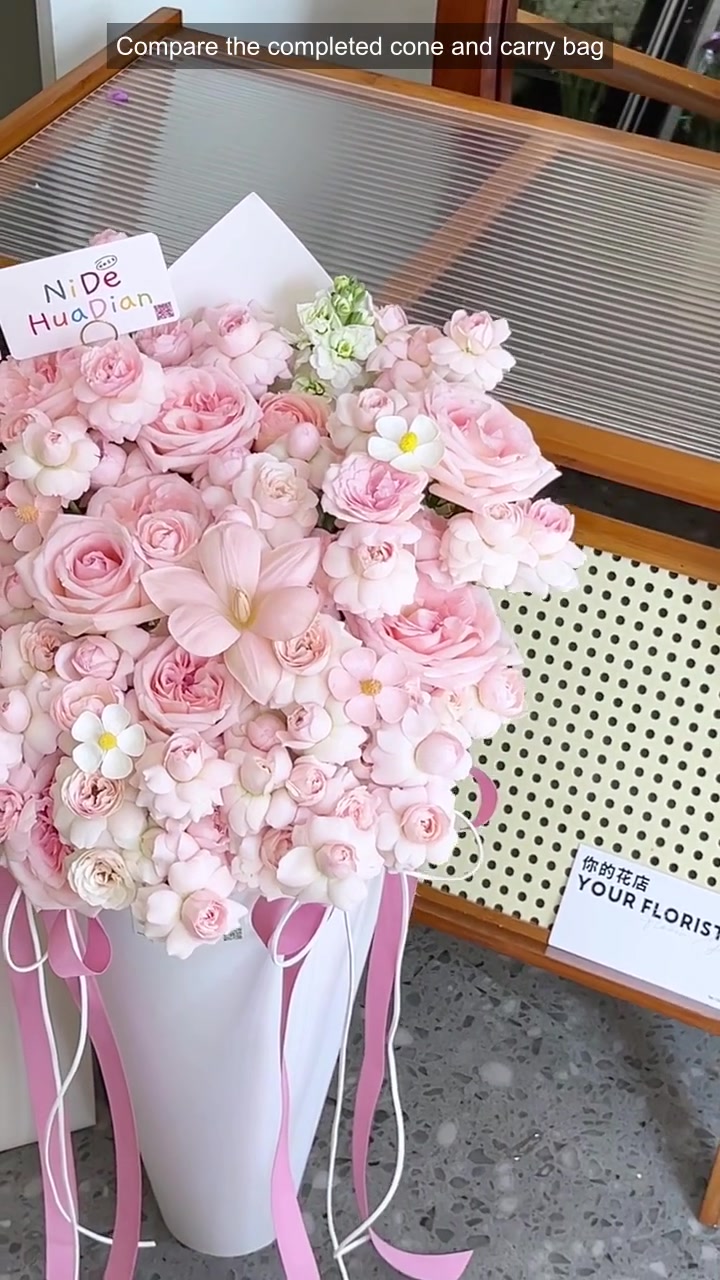
04:30–end · Compare the completed cone and carry bag
Review the tall white edge, pink flower area, long ribbon tails and carry bag as one presentation before planning the dimensions of your own version.
Plan the cone and ribbon finish
Measure your own cone, container and packed dimensions before choosing the sheet, adhesive and carrier. Include your preferred colours, quantity and destination in the enquiry.
A pink ribbon alternative
For a different pink ribbon finish, view the Pink or Lt Pink options in our listed 2.5 cm × 20Y range. Request a quote to confirm the finish and pack quantity; the cone sheet, adhesive and carry-bag fit still need matching.
View Pink ribbon options & enquire
Article: White Cone Wrapper Tutorial with Pink Floral Finishing. Article: https://fafaflower.com/white-paper-cone-pink-flower-arrangement-ribbon-tails-tutorial/. Please advise a cone-sheet and compatible adhesive option, pink ribbon and finishing cord, a display card, and a carry bag with a fitted insert for [container and packed dimensions]. Quantity: [quantity]; destination: [destination]. Please confirm composition, dimensions, selling units, pack quantities and samples.
Choose “Other” for a mixed-material enquiry.
Keep the reference text above as a copyable enquiry note.
Floral demonstration shared with permission. Guide by FAFAFLOWER.
Music: “Paper Wings” by Jason Shaw / Audionautix, CC BY 4.0. Changes: looping, excerpt, fades and level adjustment.
