Wrapping Tutorials
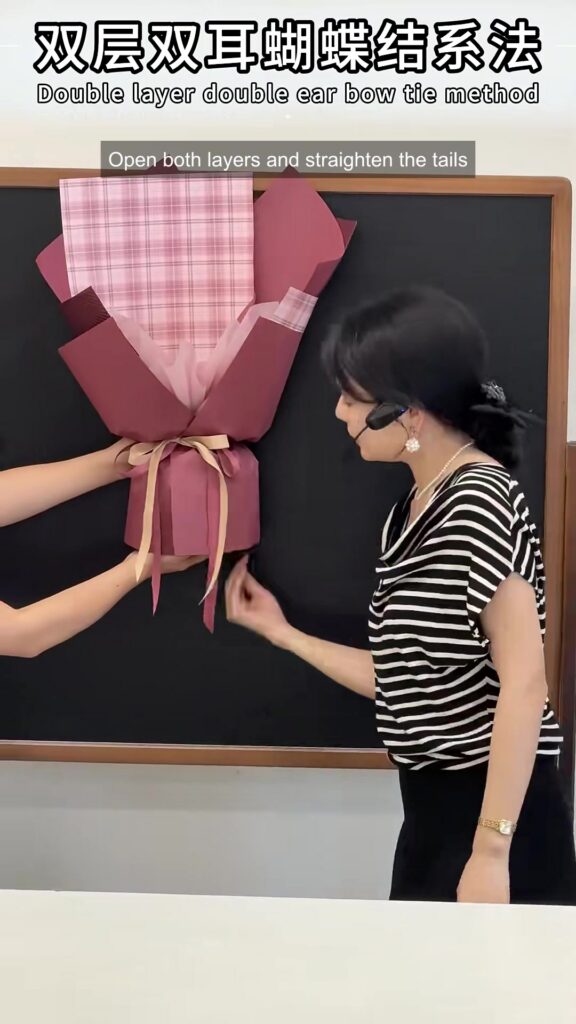
Double-Layer Ribbon Bow Tutorial for Bouquet Wrapping
Oct
Last updated:
This double-layer ribbon bow tutorial focuses on the final ribbon detail of an already-wrapped bouquet. Two contrasting ribbons create a cream and burgundy finish against pink plaid and plain burgundy paper. In the 53-second demonstration, the florist repeats a loop, wrap and pull-through sequence at the same center, then opens the loops into two visible layers. Watch the full hand movements above before following the stages below.
Materials shown in the demonstration
- An already-wrapped bouquet or demonstration support with a secure waist; paper wrapping is completed before this clip begins.
- Two contrasting ribbons. Cream and burgundy ribbons are visible, but the video does not establish their exact widths, fiber composition or total length.
- Enough accessible ribbon tails to form and adjust both layers without pulling the bouquet wrapping out of shape.
- A stable way to hold the bouquet while both hands work. The example is suspended rather than held throughout the tying sequence.
Follow the visible steps
- 00:02–00:14 — Start at the prepared waist The demonstrator introduces ribbons already attached around the wrapped support, then brings the working ends forward. Check that the paper waist is secure before tying the decorative bow. Keep the ribbons visible and separate so their paths can be followed. The video does not measure the starting ribbon lengths or demonstrate the bouquet paper construction.
- 00:14–00:20 — Hold the first loop Fold one working ribbon end back toward the center and hold the folded section with the left hand. Leave the free tail accessible. Keep the loop broad enough to open later; the hands need to hold its base rather than flatten the whole loop against the paper.
- 00:20–00:28 — Wrap the opposite ribbon The other hand brings the opposite ribbon around the held loop. Follow the full video to see which section crosses in front and which passes behind. Keep hold of the central crossing while allowing the free end to move. A twist at this stage can turn the visible ribbon face, so check both sides before tightening.
- 00:28–00:36 — Pull through and shape the first bow Draw a folded section through the central opening and ease the two sides into a bow. The demonstrator pulls and adjusts the ribbon at the center, then opens the first pair of loops. Make small alternating adjustments rather than pulling one tail hard enough to undo the loop or disturb the paper waist.
- 00:36–00:48 — Repeat for the second layer At the same central area, hold another folded loop and repeat the wrap-and-pull-through movement with the other working ribbon. This builds the second visible layer. Watch how the hands keep the earlier bow close to the waist while forming the new loops; the layers should remain distinguishable as they are opened.
- 00:48–00:53 — Open the loops and align the tails Spread the loops, adjust their relative sizes and straighten the hanging tails. Cream and burgundy sections remain visible in the finished detail. Check the bow from the viewing side and make sure the central knot stays secure when the bouquet is moved. Tail trimming and an exact cutting angle are not demonstrated in this clip.
Adjust the bow to your ribbon and bouquet
Practice the loop and pull-through movement on a spare ribbon before tying around delicate wrapping. If changing ribbon width, drape or the bouquet waist, allow enough length for a second layer and gradual adjustment. Judge loop size against the finished bouquet rather than treating the demonstrated proportions as a cutting template. Keep the lower paper fastening separate from the decorative task so the bow does not have to carry the whole bundle.
Keep both ribbon colors visible
The example uses a pale ribbon to stand out against burgundy wrapping, while the deeper ribbon connects the bow to the outer paper. Separate the loops with your fingers so one color does not disappear behind the other. A softer ribbon may fall differently from a stiffer one, so test the chosen material before repeating the look on a finished bouquet. The images do not verify satin composition, exact sizes, product stock or a specific shop item; use the actual ribbon specifications for those decisions.
Compare material options in the wrapping paper, lining paper and ribbon collections. These are related material categories; a specific listed product is not identified from the video.
The Instagram tutorial
Watch the same demonstration on FAFAFLOWER’s Instagram.
More wrapping references
Compare the panel order in our lavender layered wrapping tutorial, or read What Paper Do Florists Use? for material selection.
Original tutorial by 拂苏花艺课程 on Xiaohongshu, shared with permission. Original design and footage remain credited to the creator; FAFAFLOWER added the English visual steps. These written notes describe the visible process and are not a verbatim audio transcript.
